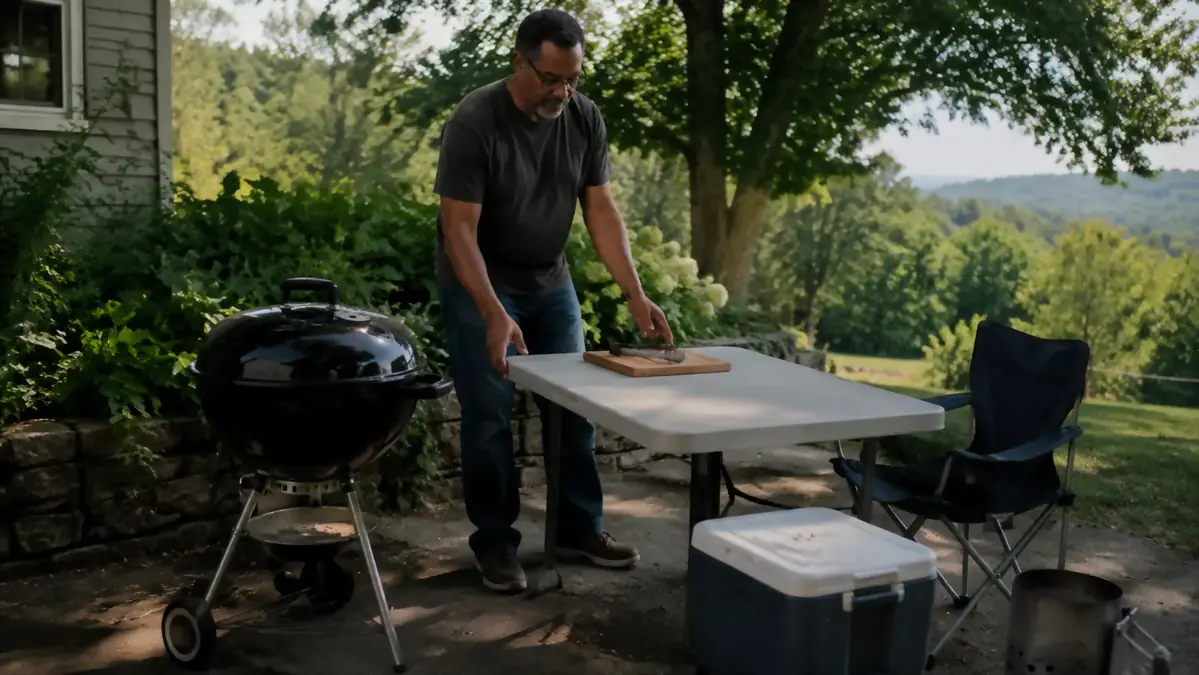
For years my whole grill station was one welded shelf bolted to the side of the kettle, about eight inches deep, just enough for a bottle of sauce and not much else. Everything else happened wherever there was room. Cutting board on the porch rail. Tongs balanced on the arm of a lawn chair. Raw chicken thighs on the same board I'd later slice the finished bird on, wiped down in between and hoped for the best. It worked, in the sense that nobody got sick, but it wasn't a system. It was me improvising every single Saturday.
What changed things wasn't a bigger grill or a fancier tool. It was setting up a folding table with an actual plan for what goes where, before the coals are even lit. I use the EastStorm table now, the one sold as a small camping table, 23 by 16 inches of surface and adjustable legs, and the table itself matters less than the order I set it up in. Anybody can drop a table next to a grill. The difference is having raw prep, tools, and finished food each with their own dedicated spot, laid out before the first match gets struck. That's what this guide walks through, five steps, the same order I use every weekend whether it's the kettle in the driveway or the pellet rig on the back patio.
One welded shelf never gave me enough room. This folding table did.
This is the EastStorm folding table the whole layout below is built around, at today's price on Amazon.
Amazon Check Today's Price on Amazon →Step 1: Pick the Spot Before You Unfold Anything
The table's position decides everything downstream, so I settle that first. For the kettle, it goes in the driveway, close enough on my dominant side that I can reach the table without turning my whole body, but far enough that grease splatter and ash don't land on the table top. For the pellet rig on the patio, it sits near enough to the wall outlet that a cord reaches without stretching across a walkway somebody could trip on.
I also check wind direction before I commit to a spot. Smoke rolling straight across a prep table isn't dangerous, it's just miserable, and it's an easy thing to avoid if you notice it before you've already got food laid out. Takes ten seconds standing there with a hand up feeling which way the breeze is moving.
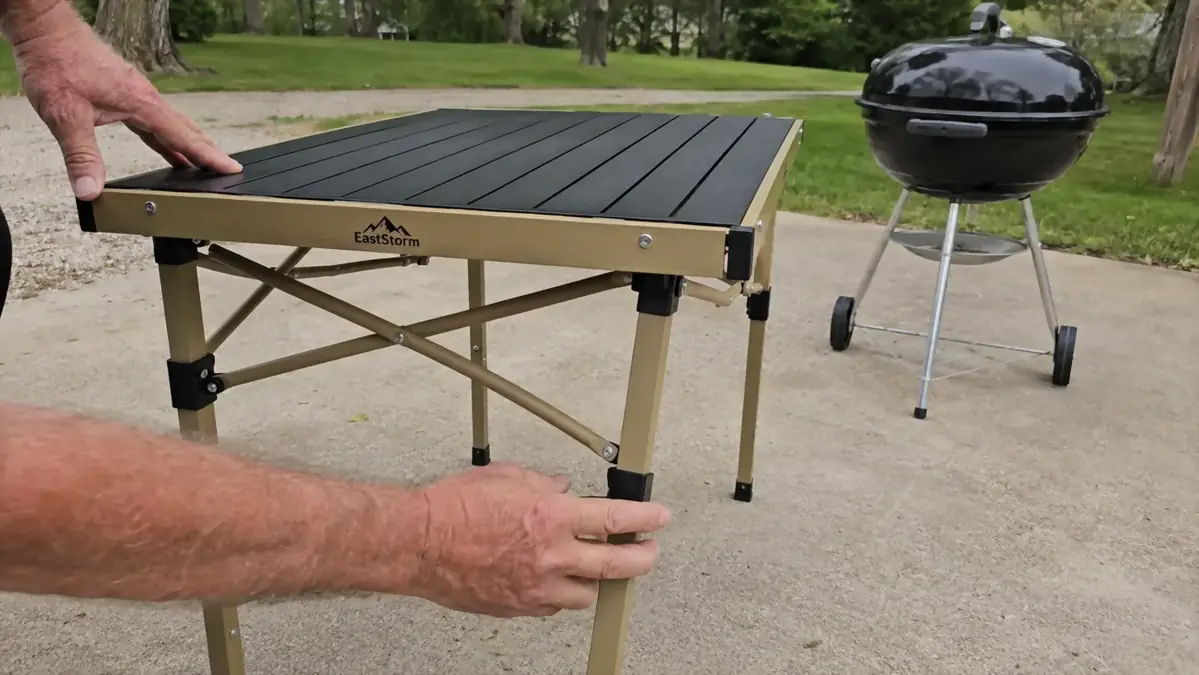
Ground matters too, more than I gave it credit for early on. The EastStorm table's legs adjust for height, but they don't correct for a driveway that slopes toward the garage the way ours does. I learned to set the two downhill legs a notch shorter than the uphill pair, otherwise a full platter has a way of sliding toward the edge right when you're not looking at it.
Once the spot's picked, I set the EastStorm table down and adjust the height before doing anything else. Renata's a good six inches shorter than I am, and if she's working alongside me on a bigger cook, she drops it a notch. Get the height right before you start loading things onto it, not after, or you'll be moving everything twice.
Step 2: Split the Surface Into Zones, Not One Big Pile
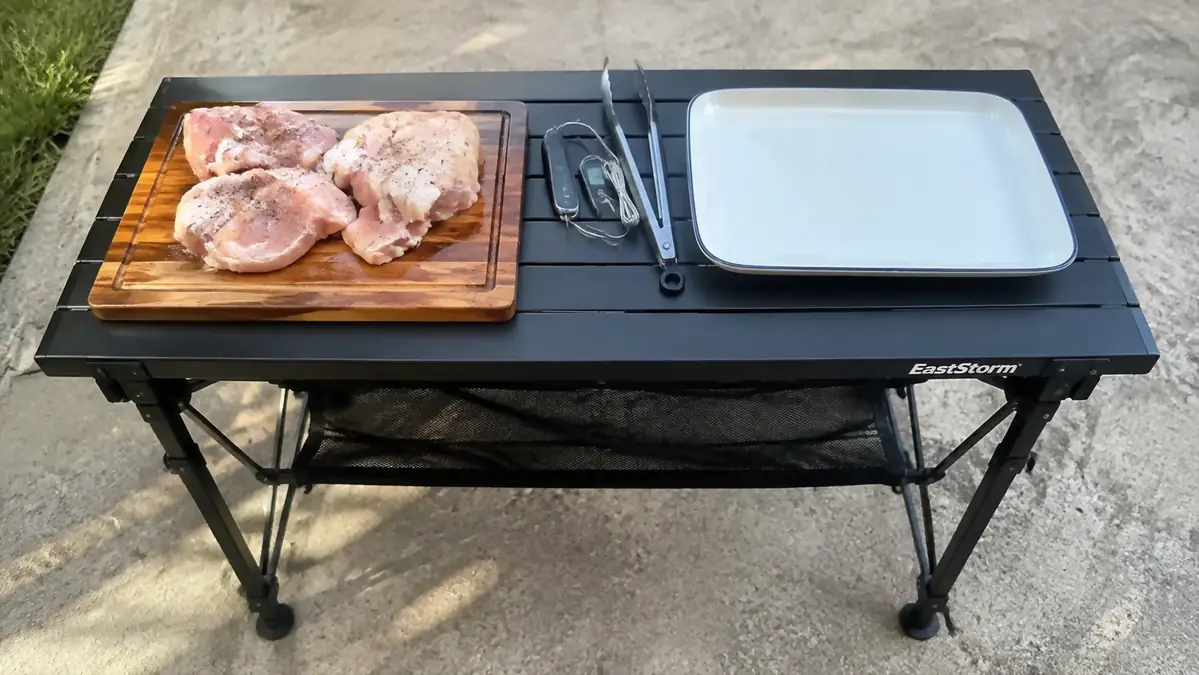
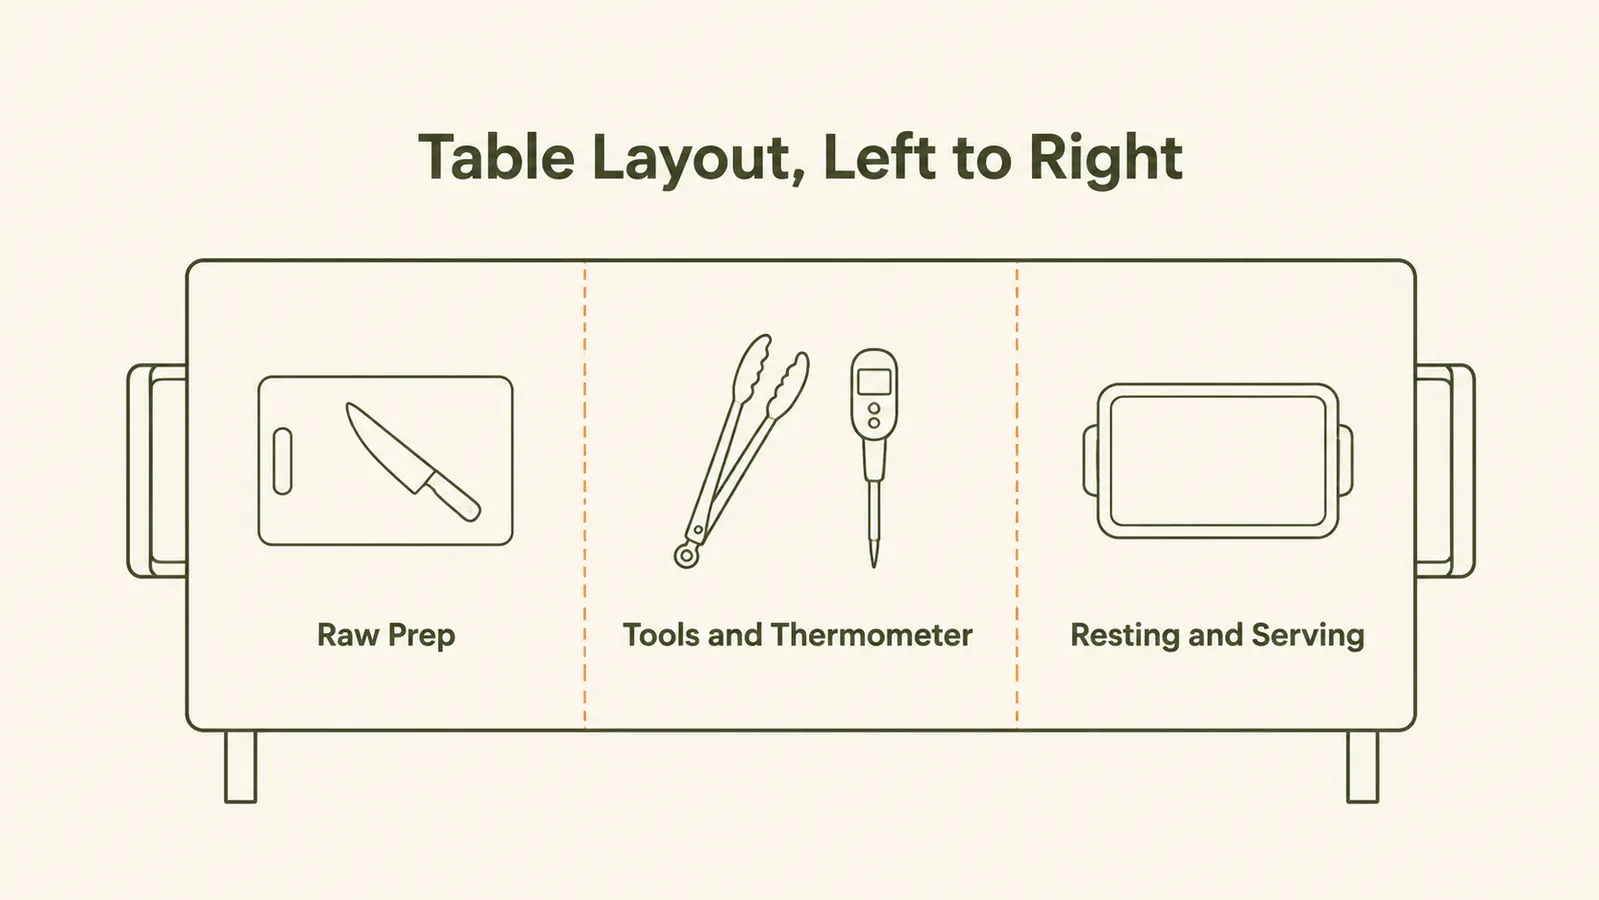
This is the step that actually fixes the problem the welded shelf never could. With 23 by 16 inches of table top to work with, I split it into three rough zones instead of treating it as one flat catch-all. One end is raw prep, the middle holds tools and the thermometer, and the far end is reserved for anything that's already cooked or resting. I don't measure it out with tape, just eyeball roughly a third for each, but I keep the split consistent every time I set up so I'm not thinking about it mid-cook.
The zone split matters most for the raw and cooked ends. I used to trim chicken thighs on the same board I'd later slice the finished bird on, and even with a wipe-down in between, it bothered me. Now raw meat stays on its end of the EastStorm table the entire time, and finished food never crosses into that space. Renata noticed the change before I said a word about why I'd started doing it.
I keep the same layout whether the table's in the driveway next to the kettle or on the patio next to the pellet rig, raw on the left, tools in the middle, finished food on the right, always in that order. Muscle memory does a lot of the work once the zones stay consistent. I'm not relearning the setup every time I switch cookers, I'm just moving the same table to a different spot.
If you're cooking for a crowd and need more separation than one table gives you, a second folding surface a few feet away for drinks and sides keeps guests from hovering in your raw-prep zone entirely. I go into more of that setup in the full season-long review of how the table's held up week to week.
Step 3: Stage Rubs, Tools, and the Thermometer Before You Light Anything
I'm bad about deciding on a rub after the coals are already lit, which used to mean a mad dash back into the kitchen with tongs still in hand. Now everything I'll need during the cook gets laid out on the middle zone of the table before I strike a single match. That means whichever jar I'm using, usually pulled from our rub sampler set, along with tongs, a spatula, and the probe thermometer.
The thermometer specifically needs a fixed spot. I've lost my phone timer in the grass more times than I want to admit, and a probe thermometer sitting somewhere I can't see it does me no good either. Putting it on the table, off the ground, in view of the grill, means I'm not hunting for it with greasy hands halfway through a cook.
This is also the step where I stage paper towels and a trash bag clipped to the table leg. Small thing, but it cuts down on trips back into the kitchen mid-cook, which used to mean leaving the grill unattended every fifteen minutes for something I'd forgotten.
I lay everything out left to right in the order I'll actually reach for it, rub closest to where the raw meat sits, tongs and spatula next since they get picked up constantly, thermometer last since I'm only grabbing it every so often to check a number. It's a small bit of order, but staging tools in the sequence you use them saves more fumbling than you'd think over a three or four hour cook.
Step 4: Give Finished Food Somewhere to Actually Land
The far end of the table, the zone I keep clear of raw prep, is where the first rack of ribs or the resting brisket goes the second it comes off the fire. Before I had this setup, that first plate went wherever was closest, usually the porch rail, or straight into whoever's hands happened to be free. I've dropped ribs on the driveway juggling a plate and tongs at the same time. Once was enough.
On the days Owen shows up for brisket, this zone pulls double duty for hours at a stretch, since resting time means that end of the EastStorm table stays occupied well after the meat's technically done. Having 23 by 16 inches of surface means I can have a cutting board going on one side of that zone while a platter of already-rested meat sits on the other, without shuffling anything to make room.
I keep a stack of foil and a couple of clean towels within reach of that zone too, since a resting brisket usually needs tenting and I don't want to be walking back inside for foil while it's sitting there losing heat. Having that within arm's reach of the landing zone is one more small thing that keeps me standing at the station instead of leaving it.
If you're feeding a crowd big enough that one table's landing zone isn't enough, that's the point where I'd start looking at a second table or a cart, and I get into that tradeoff more directly in folding table vs the built-in side shelf.
Step 5: Fold It Down and Put It Away the Same Day
The last step isn't glamorous, but it's the reason the whole system keeps working. Once the food's off and the mess is wiped down, the table folds flat and leans against the garage wall next to the grill cover. I don't leave it standing in the driveway between cookouts collecting pollen and bird mess. A table that's a hassle to put away stops getting used, and then you're back to balancing plates on a cooler.
Wiping it down before folding matters too, especially the raw-prep end. A quick pass with a damp rag and it's ready to set back up next weekend without any leftover residue. Takes maybe two minutes, and it means step one next time is just unfolding it, not scrubbing it first.
Come winter I bring the EastStorm table into the garage entirely instead of leaving it leaned against an outside wall through the cold months. It folds down thin enough to slide next to the workbench without eating up floor space, and it's dry and ready to go the first warm Saturday of spring without any rust or mildew to deal with first.
What Else Helps
A good table layout fixes where things happen, but a few other tools make the actual cooking easier once the station's set up. A grate lifter keeps you from having to grab a hot grate bare-handed when you need to add charcoal mid-cook, which matters a lot more once you've got a real prep zone next to the fire and don't want to track ash across it. If you're running a pellet rig, a proper grease bucket setup keeps drippings from turning your patio into a mess the folding table can't fix by itself. And if you're still deciding which rub to keep staged on the table every weekend, working through a sampler set against one big bottle is worth doing before you commit to just one flavor.
None of those extras matter much without the table underneath them, though. A grate lifter is only useful if you've got somewhere clean to set the grate down. A grease bucket only helps if the patio around it isn't already cluttered with whatever you couldn't find a spot for. Get the layout right first, and the rest of the gear starts pulling its weight instead of adding to the pile.
The table didn't fix my cookouts. Splitting it into zones before I ever lit a match did. The EastStorm table just gave me a surface worth organizing.
Same table, same layout, every weekend. It's the one piece of gear I set up before the coals are even lit.
See the EastStorm folding table this whole setup is built around, at today's price on Amazon.
Amazon Check Today's Price on Amazon →